
Kanas: Once You Understand the “Ticket Nesting Doll,” Your Trip Gets Easy
The hardest part of Kanas isn’t the distance, and it’s not even the cold—it’s the tickets.
The first time I went, I genuinely thought: “Wait… I already bought a ticket. Why am I buying another one?” That instant “did I just get scammed?” feeling is real.
Here’s the truth in one sentence:
The scenic area entrance ticket is NOT the same thing as how you move around inside the scenic area.
Kanas often requires you to combine:
-
Scenic area entrance ticket (entry permission)
-
Shuttle/bus tickets (transport between key spots)
-
Branch add-ons like Baihaba (often treated separately)
-
Three Bays (sometimes included in a package, sometimes not)
-
“Second entry” (usually just paying for another day of transport)
If you simply match your entry point + where you want to go, the logic becomes straightforward.

kanas
The Real Ticket Logic: What You’re Actually Paying For
Think of Kanas costs in layers:
-
Kanas Scenic Area Ticket
This is your basic entry ticket into the Kanas scenic area. -
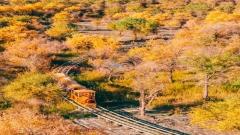
Shuttle/Scenic Buses (the real “gotcha”)
Many roads are managed routes. In peak seasons, private cars can’t drive everywhere, so you must use designated shuttles for certain sections. -
Three Bays (Wolong Bay / Moon Bay / Fairy Bay)
Whether this is included depends on your package. If it isn’t, you’ll add it on. -
Baihaba (White Haba)
If you enter Baihaba, you’ll pay the Baihaba fee. This is often handled separately and may involve border-related checks. -
Second entry (“re-entry”)
In practice, this usually means buying transport again for Day 2, not paying the entire set from scratch—though the exact rule depends on the ticket type you purchased.
“Where Are You Entering From?” Three Common Scenarios
Below is the clearest way to buy what you need: pick your route and add the matching tickets.
Scenario A: You’re Going to Baihaba
If you enter Baihaba, you pay the Baihaba ticket—whether you drive yourself or not.
Practical tip (especially for self-drivers):
On the self-drive route to Baihaba you’ll often pass a border tourism police checkpoint / station. This is the best place to handle everything quickly:
-
Check border pass (if required)
-
Register plate number
-
Buy the ticket
-
Done in about 10 minutes if you’re prepared
If your plan is Baihaba → Kanas, you’ll usually need the Baihaba ↔ Kanas shuttle segment as well. Many people prefer buying a bundle that covers the scenic ticket + this shuttle.
Important note:
The Baihaba-to-Kanas bus often does NOT pass the Three Bays, so if you want Three Bays on that day, you may need to buy the Three Bays shuttle separately after you arrive at the Kanas visitor center (there are usually QR codes posted for purchase).
Scenario B: You’re Entering from Jiadengyu (Most Popular)
This is the classic first-timer route. The rhythm is usually:
Jiadengyu → Visitor/Transfer Center → Scenic shuttle into Kanas core area
Because this line often passes the Three Bays, many ticket bundles include them, meaning you don’t need to buy an extra Three Bays shuttle.
The one mistake that costs money (learn from my pain)
If you’re returning from Wolong Bay and switching buses, ask the driver clearly where the bus is going:
-
“Is this going to the Kanas visitor center / transfer center?”
or -
“Is this going back to Jiadengyu?”
Sometimes both buses load from the same station but at different ends. I didn’t ask, got on the wrong one, and ended up being taken to Jiadengyu—then had to pay again to get back. Heartbreaking.
Scenario C: Winter Kanas (No Shuttle = Not Solo-Friendly)
In winter, shuttle/buses may be limited or not operating, so the main options become:
-
Self-drive
-
Carpool
-
Private charter
This is why winter can feel unfriendly for solo travelers. But it’s still doable—if you use the right transfer method.
kanas
Winter Solo Travel Method
If you want a one-day winter trip without driving yourself, here’s a workable approach:
Step 1: Train arrival tip — go to “Beitun City Station”
If you’re taking the train, choose Beitun City Station (note: it’s not the same as “Beitun Station”).
Outside the station, there are often business vans calling out for passengers to Burqin. A typical pattern is:
-
About 50 RMB per person
-
Roughly 1.5 hours to Burqin passenger station
Examples (based on common routes):
-
From Urumqi: overnight train to Beitun City Station
-
From Bole: often transfer at Kuitun to reach Beitun City Station
-
From Altay: some people do an Altay round trip to Kanas by carpool/charter (pricing varies widely by season)
Step 2: From Burqin, join a Kanas “Three Bays day trip” carpool
At Burqin passenger station, tell them clearly:
-
“Kanas Three Bays one-day tour,” or
-
“Carpool to Kanas for Three Bays”
Many drivers have group chats by route. They’ll match you with a driver and confirm details.
Typical rhythm:
-
Depart around late morning
-
Return around 7–8 pm
-
Some drivers can drop you at a specific spot in the city
Step 3: How the day usually works (realistic expectations)
Sometimes you’ll share the car with people staying in Kanas village. Drivers may:
-
Drop others at homestays first
-
Go eat
-
Then continue sightseeing
If you’re solo, you might walk a bit around Kanas old village / lake area while waiting—totally manageable, but it does require patience and warm clothes.
kanas
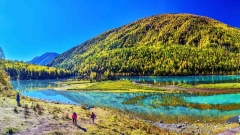
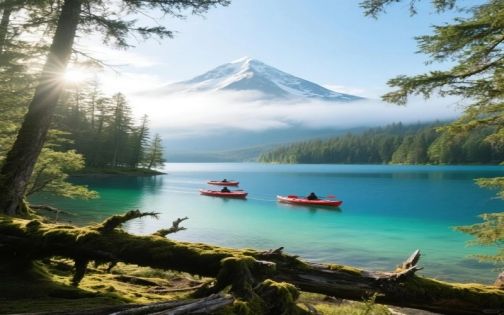
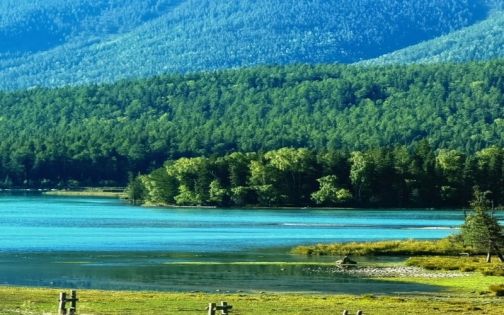
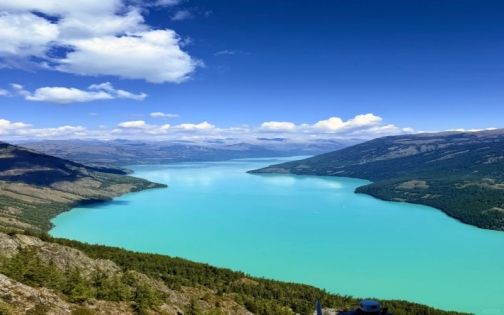
The Best Part of the Altay Loop: “Three Bays + One Lake”
After doing the Altay loop, the one thing that stayed in my head was Three Bays + Kanas Lake.
We were self-driving, didn’t want to over-plan, so we took the most classic route:
Xiaohu Checkpoint → Wolong Bay → Moon Bay → Fairy Bay → Kanas Lake
Don’t skip: Xiaohu Checkpoint
This spot is criminally underrated. The views are genuinely beautiful and it’s one of those “why is nobody talking about this?” places.
Time allocation advice (especially in winter)
-
Wolong Bay + Moon Bay: quick stop, park, take a couple photos, move on
-
Save your best time for:
-
Fairy Bay
-
Kanas Lake boardwalk
-
Fairy Bay: go all the way to the water
Don’t just stand at the main viewpoint and leave. Walk down closer to the lakeside—this is where photos become clean, transparent, and layered.
We arrived around 5 pm, and the sunlight still reached the surface, making everything look extra clear.
Kanas Lake: the “I almost skipped it” moment
Online photos didn’t convince me, and honestly my partner didn’t want to go down to the lake. But I insisted.
At around 6 pm, we reached the lakeside—and it was unreal.
Even when the sun is low and the lake surface isn’t shining, the mist over the water can make the scene look like it’s wrapped in soft light. It’s the kind of view that resets your mood for an entire year. If you only do one thing deeply in Kanas, do this.
Photo Spots That Actually Work
1) The “unnamed photo point” before Wolong Bay
It doesn’t always have a clear map label. You’ll know it when you see it:
-
People stop by the roadside
-
There’s a river section where you can step onto the ice (be careful)
-
Standing on the ice makes photos look dramatic and clean
2) Fairy Bay + late afternoon light
Late afternoon is flattering for people and gives the water a clearer tone. Walk to the lakeside area for the best angles.
3) Kanas Lake boardwalk > quick viewpoint
The real scenery is on the boardwalk along the lake.
Don’t just go down the stairs, snap the viewing platform, and turn back. A lot of people do—and they miss the best stretch.
Want to Ride a Horse at Fairy Bay? Here’s How to Avoid Regret
Yes, you can often ride horses at Fairy Bay, and local herders usually manage it.
My tips:
-
Ask clearly: price per person, duration, route
-
Confirm: can they help take photos/videos?
-
If you want to negotiate, do it politely (often easier off-peak)
-
If traveling with friends, try to choose someone who actually knows how to take photos—because the difference is night and day
kanas
A Very Usable 2-Day Itinerary
This is built from your outline and adjusted into a smoother, “normal traveler” pace.
Day 1: Three Bays + a scenic walk
-
Late morning: arrive at the visitor/transfer center, store luggage, eat lunch
-
Early afternoon: take the bus/shuttle to Fairy Bay (30 min to 1 hour)
-
Then go to Moon Bay (about 30 min)
-
Walk from Moon Bay to Wolong Bay (about 2 km / around 1 hour)
-
This section is stunning in autumn: golden forests, very photogenic
-
-
Arrive at Wolong Bay (30 min)
-
Return by shuttle to the center
-
Dinner near your stay (either near the visitor center or near your homestay)
Day 2: Guanyu Platform morning mist + Kanas Lake boardwalk
-
Early: take the bus to Guanyu Platform for morning mist (allow 2.5–3 hours)
-
Back for lunch
-
Afternoon: Kanas Lake boardwalk loop (1.5–2 hours if you take photos)
-
Exit the scenic area
Warmth Is Your Second Ticket
Cold ruins trips faster than crowds.
A simple clothing formula that works:
-
Base layer: thermal underwear (avoid pure cotton if you sweat easily)
-
Mid layer: fleece or wool
-
Outer layer: windproof waterproof shell or thick down jacket
-
Bottoms: fleece-lined pants + windproof outer pants if needed
-
Shoes: non-slip winter boots + thick wool socks
-
Accessories: hat, neck gaiter/scarf, gloves (these decide whether you’ll enjoy taking photos)
In our group of four, I was the only one who stayed consistently warm—and I was also the only one who didn’t rush through every viewpoint trying to escape indoors.
Quick Q&A
Q1: Why do I keep paying even after buying a ticket?
Because you bought the entry ticket, but you still need transport tickets inside the scenic area, plus possible add-ons (Baihaba/Three Bays).
Q2: What does “second entry” mean?
Usually it just means buying another day of shuttle/transport, not paying the full set again.
Q3: Is winter solo travel impossible?
Not impossible—just more dependent on carpool/charter/self-drive, since shuttle service can be limited. The Burqin carpool approach is the easiest workaround.
Q4: Should I spend a long time at Wolong Bay and Moon Bay?
If you’re short on time (or it’s winter), don’t overstay. Save your best time for Fairy Bay and Kanas Lake boardwalk.