
Pink Skies Meet Snowy Mountains: The Most Practical Winter Guide to Sayram Lake
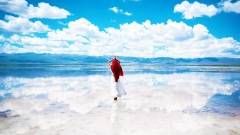
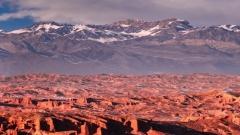
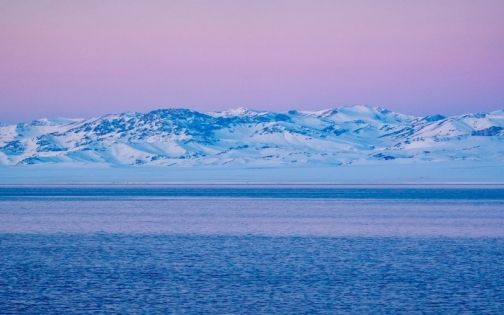
Winter at Sayram Lake is unreal: pastel-pink skies, “golden peak” sunlight on the mountains, and blue ice with bubble patterns that look like pearls frozen mid-air. But it’s also brutally cold, windy, and road conditions can change fast.
1 Quick Facts You Actually Need
Tickets & transport inside the park
-
Ticket bundles vary by season and policy. You’ll generally see options like self-drive packages and ticket + shuttle combinations. Always follow the on-site policy for the day.
Is winter self-driving recommended?
If you’re not experienced with snow/ice driving: no. Wind-blown snow can ice up roads fast, visibility can drop suddenly, and temporary traffic control happens. The safest ranking for winter is usually:
Private car (charter) > Carpool (small group) > Shuttle bus
Shuttle bus reality check
Shuttles are convenient but time-limited, which makes sunrise/sunset chasing hard. If your goal is pink sunset and you want to stay late, a private car or self-drive is much more reliable.
2 Best Time to Visit
-
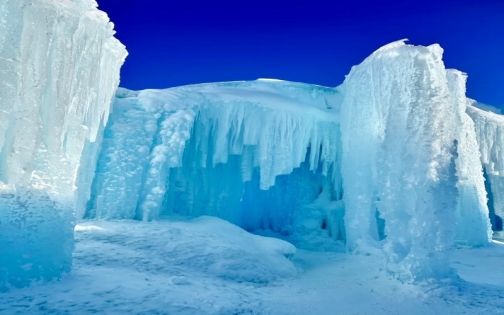
Blue ice / bubble ice tends to be best in deeper winter, but it depends on temperature swings and lake ice conditions—no two days look exactly the same.
-
Pink sunrise/sunset depends on cloud layers and clean air. Thin clouds often create the best pastel gradients.
-
Best mindset: winter Sayram is a “lucky draw,” but you can raise your odds with a smart route and early positioning.
Sea of Saimon
3 Packing List
Layering that works
-
Base layer: moisture-wicking thermal (avoid pure cotton against skin)
-
Mid layer: fleece or light down
-
Outer layer: windproof shell (wind is what hurts most here)
Extras that matter: neck gaiter/face cover, hand warmers on abdomen/back, anti-slip shoe spikes if you’re nervous on ice.
Footwear
-
Snow boots or hiking boots with grip + thick wool socks
Ice here can feel like a polished floor—regular sneakers are a bad idea.
Electronics survival
-
Power bank in an inner pocket
-
Spare camera batteries kept warm
-
Hand warmer on the back of your phone (not on the screen)
Photo add-ons (optional but useful)
-
Phone macro mode or a clip-on macro lens for bubble ice
-
Small tripod for low-light sunset shots
4 Transportation Options: What You Gain & What You Give Up
Self-drive (only for confident winter drivers)
-
Prefer 4WD + winter tires
-
Don’t run the fuel tank low; idling for heat burns more than you expect
-
If there’s a closure/traffic control: accept it—this isn’t the place to argue with winter
Private car (most recommended)
-
Biggest advantage: you control timing (critical for sunset)
-
Before you book, confirm three things:
-
Can you arrive early enough for your chosen sunrise viewpoint?
-
Can the driver wait for sunset around 19:00–19:30 (season-dependent)?
-
If roads close, what’s the backup route/plan?
-
Carpool (best value)
-
Cheaper, but you’ll share time at stops
Choose small-group carpools if you care about photos.
Shuttle bus (best for a relaxed daytime loop)
-
Great for “see a few spots and go”
-
Not ideal if you must catch the best sunset colors and stay late
Sea of Saimon
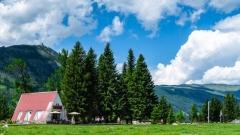
5 Where to Stay: One Night Makes Everything Easier
If you want sunrise without chaos, the most practical move is:
Stay near the East Gate (or inside the scenic area) the night before.
You wake up warm, start early, and you’re not racing in the dark.
6 The Classic “Sunrise + Sunset in One Day” Route
This plan is designed for high photo success with minimal backtracking.
Recommended start (from Yining as reference)
-
06:30 depart Yining (earlier = less stress and fewer delays)
-
Aim to reach the East Gate area before sunrise shooting time
Sunrise window
-
Winter sunrise feels “late” here—often around 09:00–09:30 for the best color window (season/weather dependent).
Arrive 10 minutes early to grab your spot.
7 Precise Loop Timeline (Stops + Driving Time + What to Shoot)
The full loop is about 90 km. In winter, a comfortable pace is ~10 hours if you want both sunrise and sunset.
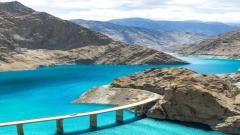
Stop 1: East Gate → Moon Bay / “Colorful Lake” area (Sunrise main spot)
What to shoot
-
Before sunrise: pink gradient sky
-
After sunrise: “golden peaks” on the snowy mountains
Composition tip: ice texture in foreground + lake midground + mountains top third.
Stop 2: Moon Bay → Waterside Beach (about 6 km / ~15 min)
Good for calm shoreline portraits. Wear bright colors (red/yellow/white) for contrast.
Stop 3: Waterside Beach → Dianjiangtai (about 12 km / ~20 min)
Often a decent mid-stop for a break (hot drink / restroom if available).
Roadside mountain-background shots can be great—only stop where it’s safe.
Stop 4: Dianjiangtai → Kele Yongzhu Spring (about 15 km / ~25 min)
Winter highlight: unfrozen spring + bubble ice.
Phone macro bubble-ice method
-
Turn on macro/close-up mode
-
Get the lens close to the ice surface (don’t press into wet spots)
-
Wipe the lens with a glove before shooting
-
Tap-focus on the bubble layer for the “pearl chain” effect
Stop 5: Kele Yongzhu → Lighthouse (about 7.5 km / ~10 min)
Minimalist shots: lighthouse centered, mountains behind, ice textures in front.
If thin clouds appear, sunset colors here can be gorgeous.
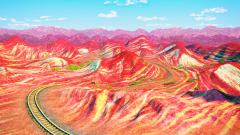
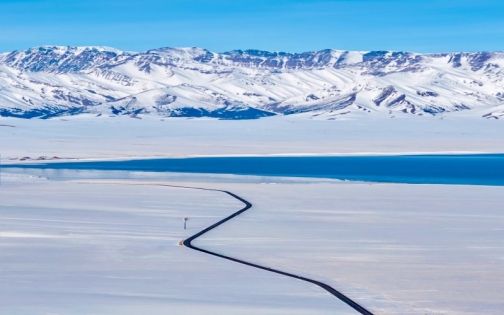
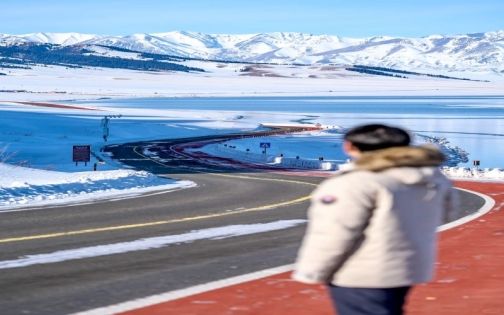
Stop 6: Lighthouse → Famous S-Curve Road (about 3.4 km / ~5 min) — Sunset battlefield
This is where you get the “road stretching into the mountains” shot.
Key move: arrive 1.5–2 hours before sunset to secure parking and a clean frame.
S-curve shooting tips
-
Low angle near the road surface for strong leading lines
-
Stand on the roadside safety area, not in the lane
-
The best pink often peaks around sunset and shortly after—don’t leave too early
Stop 7: Pine Head (Songshutou) — Winter caution
It looks short but gets steep fast; snow deepens higher up and descent can be slippery.
Recommendation: go only to the lower/second viewing platform, skip the summit.
Exit: Pine Head → South Gate (about 2 km / ~5 min)
If you see a perfect light moment, stop only at safe pull-offs. Wind-blown snow can make sudden stops dangerous.
Best sunset section overall:
For the highest hit-rate, focus your sunset time on Kele Yongzhu → Lighthouse → S-curve.
Sea of Saimon
8 Photo Tips (Even If You’re Not a “Camera Person”)
Phone
-
Turn on HDR
-
Slightly reduce exposure (around -0.3 to -0.7) to keep sky color layers
-
Ultra-wide is fun, but keep people away from the edges to avoid distortion
Camera
-
Snow scenes overexpose easily—dial exposure down a bit
-
Cooler white balance often looks cleaner for blue ice and snow
Outfit tip
Bright outerwear (red/orange/yellow) pops against blue ice and white snow—just don’t sacrifice windproof warmth for looks.
9 Small Details That Make or Break Comfort
-
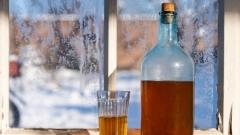
Bring high-calorie snacks (nuts, chocolate) and a thermos
-
Restrooms aren’t guaranteed at every stop—use them when you see them
-
Signal may fluctuate; download offline maps before you go
glacier
10 Backup Plans for Extreme Weather (Very Real in Winter)
-
Strong wind / blowing snow: shorten the loop and focus near easy-exit areas. Fewer stops, better safety, still great photos.
-
Road closures: switch to a “precision photo day” near the East Gate—sunrise + ice details + sunset without chasing the full loop.
-
Traveling with seniors/kids: use “quick-shoot cycles” (5–8 minutes outside, then warm up in the car).
11 Common Mistakes to Avoid
-
Betting your sunset on the shuttle bus schedule
-
Wearing cute but non-windproof clothing
-
Walking onto untouched ice for bubble photos
-
Arriving at the S-curve too late for parking
-
Forcing a summit hike at Pine Head in deep snow