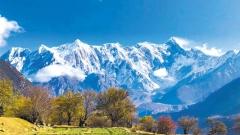

To capture the magnificent view of Kailash, the pyramid-shaped snow-capped mountain, finding the right location and angle is crucial. Different shooting spots offer completely different visual effects and experiences. Whether it’s an easily accessible viewing area by the road or a hidden corner that requires hiking, each location showcases a unique side of the holy mountain. Understanding these specific spots, suitable shooting times, and necessary preparations can help you plan your shooting trip more effectively and greatly increase the chances of getting your ideal photos.
Around Tarqin: Easily Accessible Classic Shooting Spots
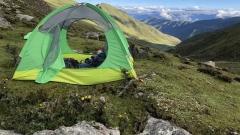
Tarqin Town is the starting point and base for most travelers to shoot Kailash. There are several viewing spots near the town with good visibility that can be easily reached on foot, suitable for shooting panoramic views and the classic “Golden Sunset on the Mountain” scene.
Viewing Platform on the West Slope Outside the Town
This is the most famous and frequently used shooting location. From the center of Tarqin Town, walk west for about 20 minutes to reach an open slope. It directly faces the south wall of Kailash with an unobstructed view. From afternoon to evening, the sun shines on the mountain from the side, making it the best time to shoot the “Golden Sunset on the Mountain” effect. It is recommended to use a medium-telephoto lens such as 70-200mm to make the mountain peak look closer and more majestic. Shooting here in the early morning is backlit, but if there is thick morning fog surrounding the mountainside, you can also take very artistic silhouette photos.
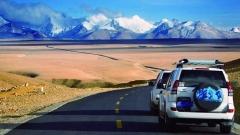
Specific Curves on National Highway 219
On National Highway 219 connecting Tarqin and Purang County, several bends provide special composition perspectives. One of the bends can use the curve of the road itself as a visual guide, leading the viewer’s sight to Kailash in the distance, making the photo more layered and dynamic. This location is suitable for shooting when the light is soft in the early morning or evening, and a wide-angle lens of 16-35mm can accommodate more surrounding environments.
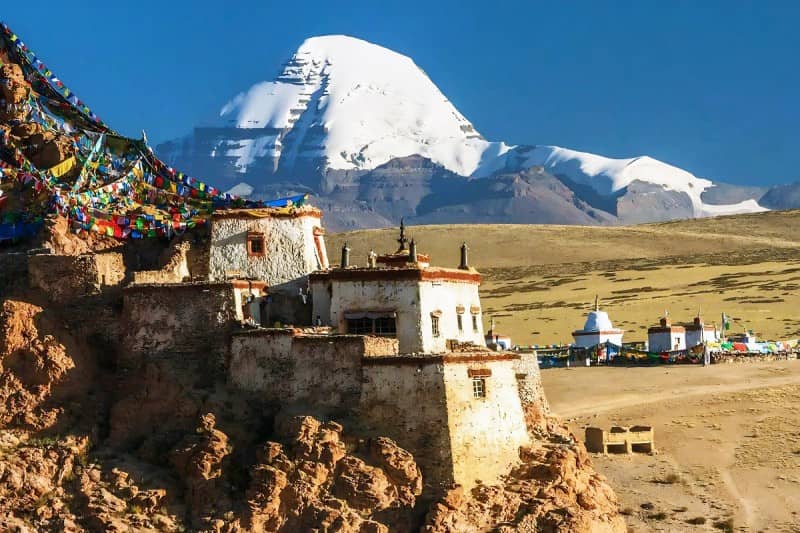
Mount Kailash
During the Pilgrimage: Close-Up & Multi-Angle Shooting Spots
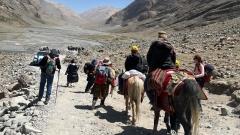
If you choose to take the pilgrimage route, you will have the opportunity to watch and shoot Kailash up close from multiple sides. The pilgrimage path itself is a moving shooting route.
Location of Zhorep Monastery
This is the most important shooting spot on the pilgrimage route, bar none. The monastery is located directly in front of the north wall of Kailash, very close by, allowing clear views of the rock textures of the mountain. It is an excellent location to shoot the sunrise in the early morning. When the first ray of sunlight illuminates the top of the mountain and gradually covers it downward, the scene is extremely shocking. Many pilgrims choose to stay here for one night to shoot the sunrise in the early morning, and can also shoot the holy mountain under the starry sky at night.
Looking Back View Before Drolma La Pass
During the final section of the climb to Drolma La Pass, looking back, you can see Kailash showing a broad side profile, contrasting with the vast river valley below, creating a grand and desolate picture. This angle is suitable for shooting in the morning with favorable light, which can better show the details and texture of the mountain.
By the Holy Lakes: Shooting Spots Using Water Composition
The holy lakes Manasarovar and Lhanak La (Ghost Lake) provide excellent foregrounds for shooting Kailash. Using the water surface, you can shoot reflections or enhance the layering of the picture.
Lakeside Near Chiu Monastery by Manasarovar Lake
The lakeside next to Chiu Monastery is the most famous place to shoot the reflection of Kailash in the water. You need to find a calm water surface to reflect the complete mountain shadow. Windless early mornings are the best time to achieve this shot. A wide-angle lens can capture more of the lake surface and sky at the same time. Using a polarizing filter here can reduce water glare and make the reflection underwater clearer.
East Bank of Lhanak La Lake (Ghost Lake)
Unlike the calmness of Manasarovar Lake, Lhanak La Lake usually has strong winds and waves, with deep blue water and a more rugged background. At certain locations on its east bank, you can include the dark lake water, wasteland, and Kailash in the picture together, creating a unique atmosphere of loneliness and depth. This location is suitable for shooting when the weather is changeable and the clouds are dramatic.

Manasarovar Lake Reflection
Advanced Shooting Spots Requiring Hiking Exploration
If you are willing to put in more physical effort to find a unique perspective, the following two locations are worth considering.
Cliff Where Gyangzha Monastery (Dragon Monastery) Is Located
This monastery is located on a high cliff east of Tarqin and requires a climb to reach. From the monastery’s location, you can overlook the entire Tarqin River Valley, including the distant Kailash, the villages and roads at the foot of the mountain, resulting in a composition rich in information and storytelling. It is an ideal location to shoot the village lights at dusk and the starry sky at night, requiring a wide-angle lens and a stable tripod.
Hillside Near Huo’er Township
This is a less mentioned but uniquely angled location. On a certain high slope on the way from Huo’er Township to Manasarovar Lake, at a specific angle, it is possible to use both Manasarovar Lake and Lhanak La Lake as foregrounds to set off Kailash in the distance. Finding this shooting spot requires careful searching and has high requirements for air transparency, but once successful, the photos taken will be very unique.
Equipment & Execution Key Points for Actual Shooting
Required Lenses
– Wide-angle lens (16-35mm): Must carry. Used for shooting large scenes including lakes, monasteries, roads, etc., to show the relationship between the environment and the holy mountain.
– Medium-telephoto lens (70-200mm): Must carry. Used for close-up shots of the mountain peaks, compressing the scenery to highlight the thickness of the mountain, and also suitable for shooting the interaction between people and the mountain on the pilgrimage route.
– Longer telephoto lens (100-400mm): Recommended if physical strength allows. Can capture the delicate details of the mountain rocks from a distance, such as shooting the local part of the north wall at Zhorep Monastery.
Mastering Shooting Times
– Golden Hour: Within one hour after sunrise and before sunset, the light is warm and soft. Remember, locations on the east (such as Zhorep Monastery) are good for shooting sunrises, while locations on the west and south (such as Tarqin) are good for shooting sunsets.
– Blue Hour: After sunset and before the sky turns completely dark, it will present a deep blue color. At this time, you can shoot the combination of ground lights and the silhouette of the holy mountain.
– Starry Night Period: Choose a clear night without moonlight interference. In places far away from light pollution such as Zhorep Monastery and Gyangzha Monastery, you can shoot the scene of the Milky Way spanning the mountain peaks.
Special Notes for Shooting at High Altitudes
The plateau climate is dry with strong winds and sand, so pay attention to dustproofing for cameras and lenses. Low temperatures will cause battery power to drain quickly. Be sure to prepare enough spare batteries and keep them warm in inner pockets. Slow down your pace when activities at high altitudes and always pay attention to your physical feelings while shooting.
Specific Shooting Itinerary & Preparation Suggestions
To successfully take ideal photos of Kailash, careful advance planning is very important. Before departure, you can prepare according to the following steps based on your target shooting spots:
- Clarify shooting locations and times: First determine which shooting spots you want to visit (e.g., Tarqin Viewing Platform for sunset, Zhorep Monastery for sunrise), then arrange your accommodation and arrival time based on the orientation of these spots to ensure you catch the best light.
- Organize and check equipment: Prepare equipment according to the lens suggestions mentioned earlier. Be sure to bring enough spare batteries and memory cards. Polarizing filters and graduated neutral density filters are very useful. A sturdy and reliable tripod is the foundation for taking good sunset and starry sky photos.
- Make personal preparations: The Ali region has a high altitude, so be sure to pay attention to preventing altitude sickness and slow down your movements. Clothing should be windproof, sunproof, and warm. It is best to carry a thermos and some high-energy food while shooting.
- Keep the plan flexible: The weather on the plateau changes quickly, and sometimes the most wonderful light appears just before or after rain and snow. Even if you encounter cloudy weather, don’t give up easily. Changing clouds may bring unexpected effects.
Capture the Most Beautiful Sacred Mountain
Photographing Mount Kailash is not about a single viewpoint, but about understanding direction, light, access conditions, and physical limits at high altitude. Knowing where to be — and when — greatly increases your chances of capturing the mountain at its best.
For photographers who want realistic planning, safe access to key viewpoints, and flexible schedules that match weather and light conditions, China Dragon Travel offers practical route and accommodation advice based on real field experience, allowing you to focus fully on the act of photography.